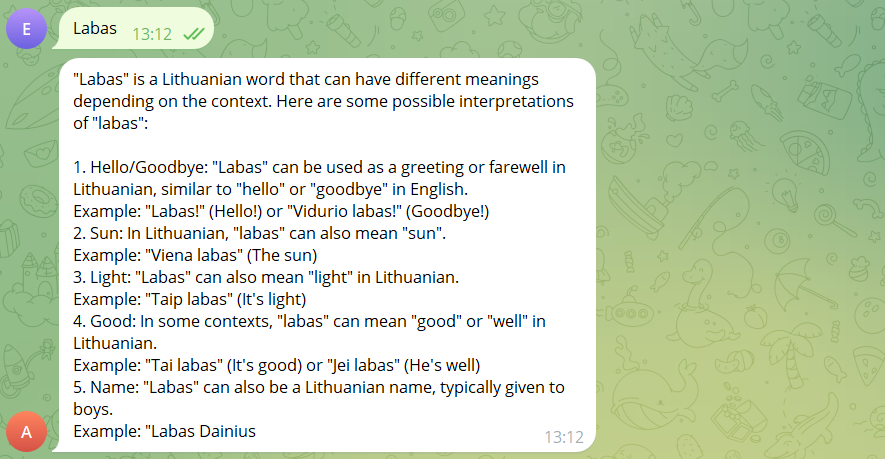
How to create a free, serverless AI chatbot for Telegram

For the creation, we will use the following tools:
- CloudFlare Workers AI with "llama-2-7b-chat-int8" model;
- The CloudFlare Workers application;
- Cloudflare KV (key-value) data storage system for storing chat history.
1. First, you can create a Telegram bot in the Telegram app by contacting the @BotFather and executing the /newbot command, as well as coming up with a name for the bot.
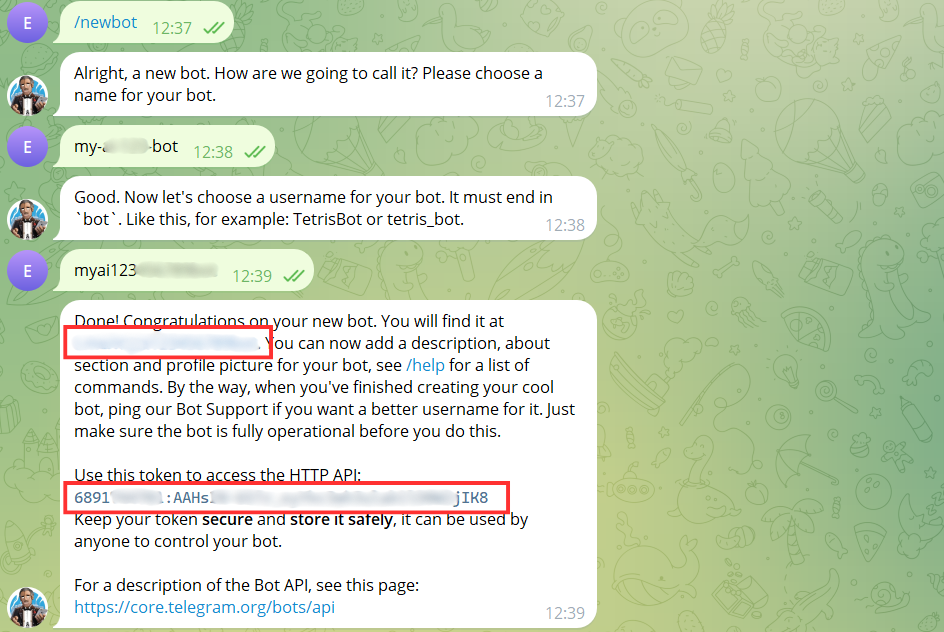
After creating the bot, you will receive a message with the bot's HTTP API key. Copy this key and save it for further use. You will also see the address of your chatbot.
2. After logging into Cloudflare at: https://www.cloudflare.com/, you need to create a KV data storage location. It is necessary to store chat history.
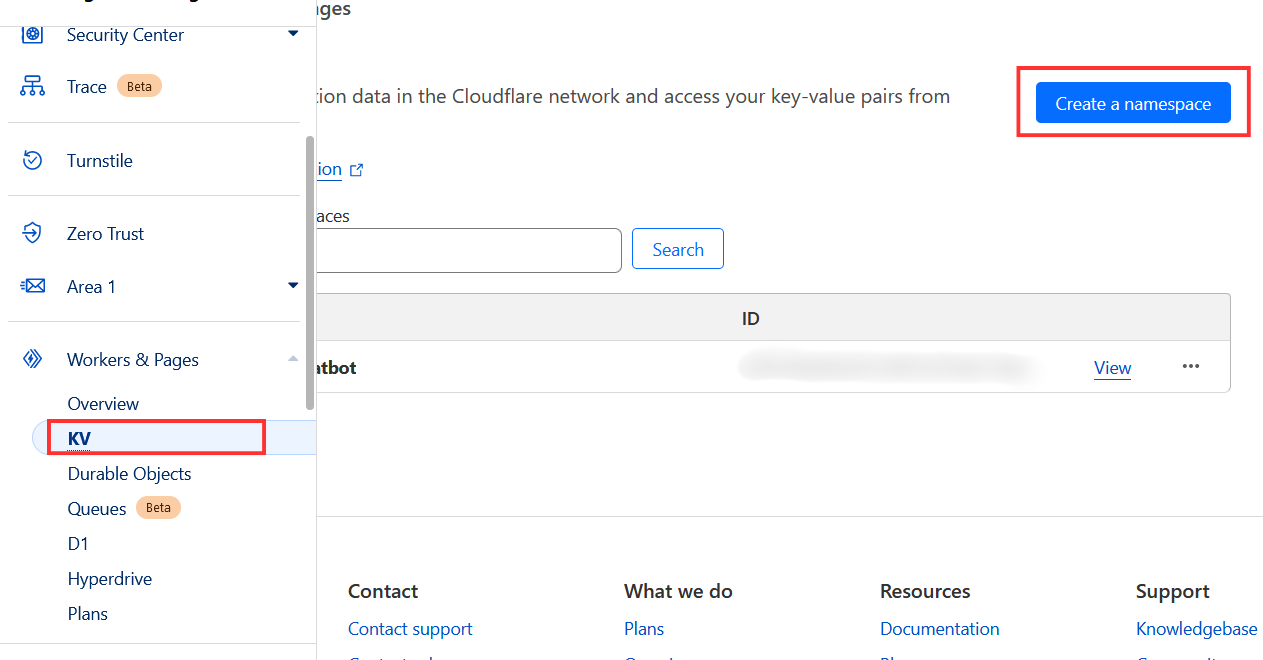
3. Next, in the "Workers & Pages" section, create a new application.

4. When creating the application, you can choose the "LLM App" template.
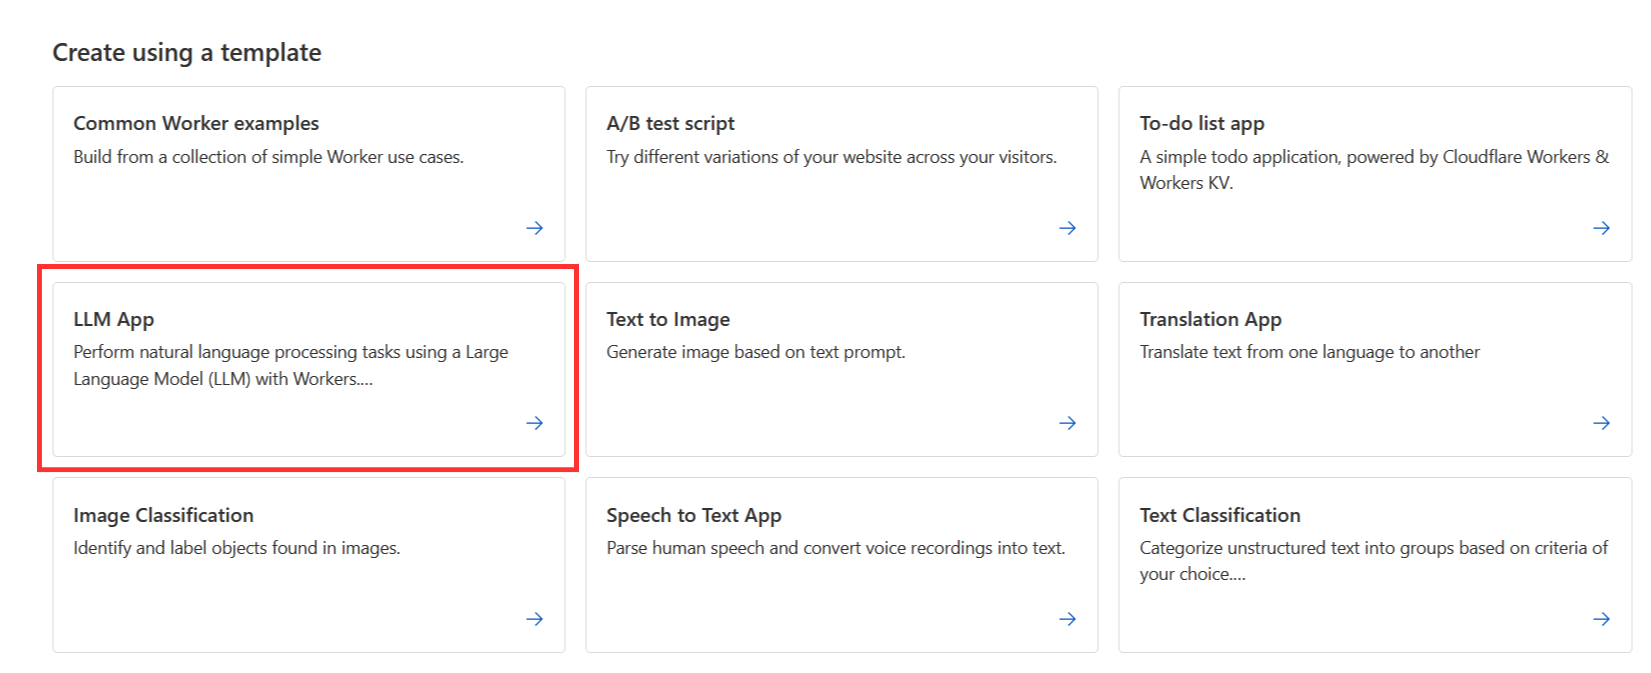
5. Create a name for the bot and save the https:// address, which will be used to access the future bot.

6. Next, select "Configure Worker".

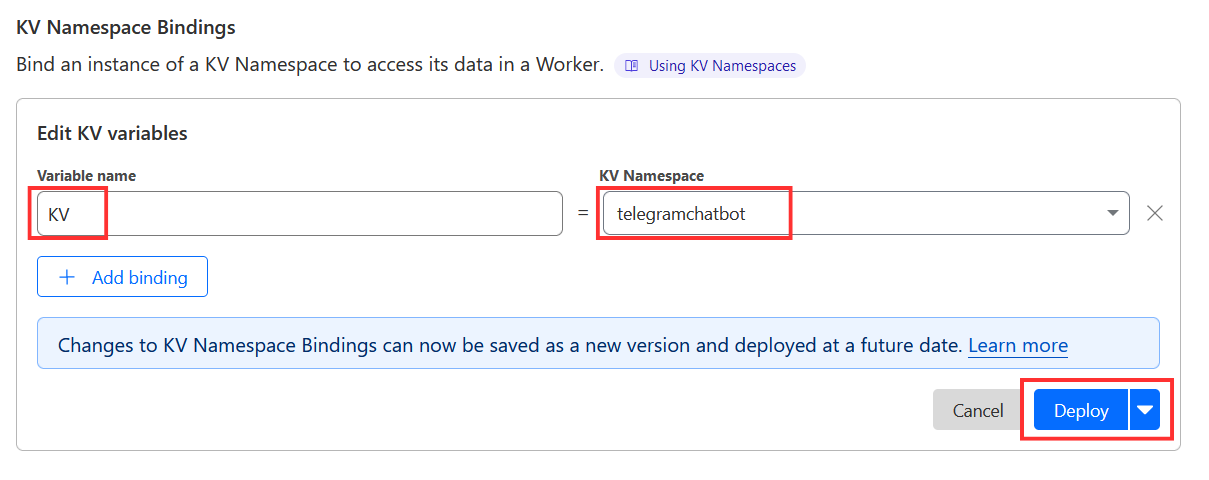
7. In the "Settings" section, select "Variables" and there you will find a section named "KV Namespace Bindings".

8. Find the previously created KV data storage, name it "KV" and save it by clicking "Deploy".
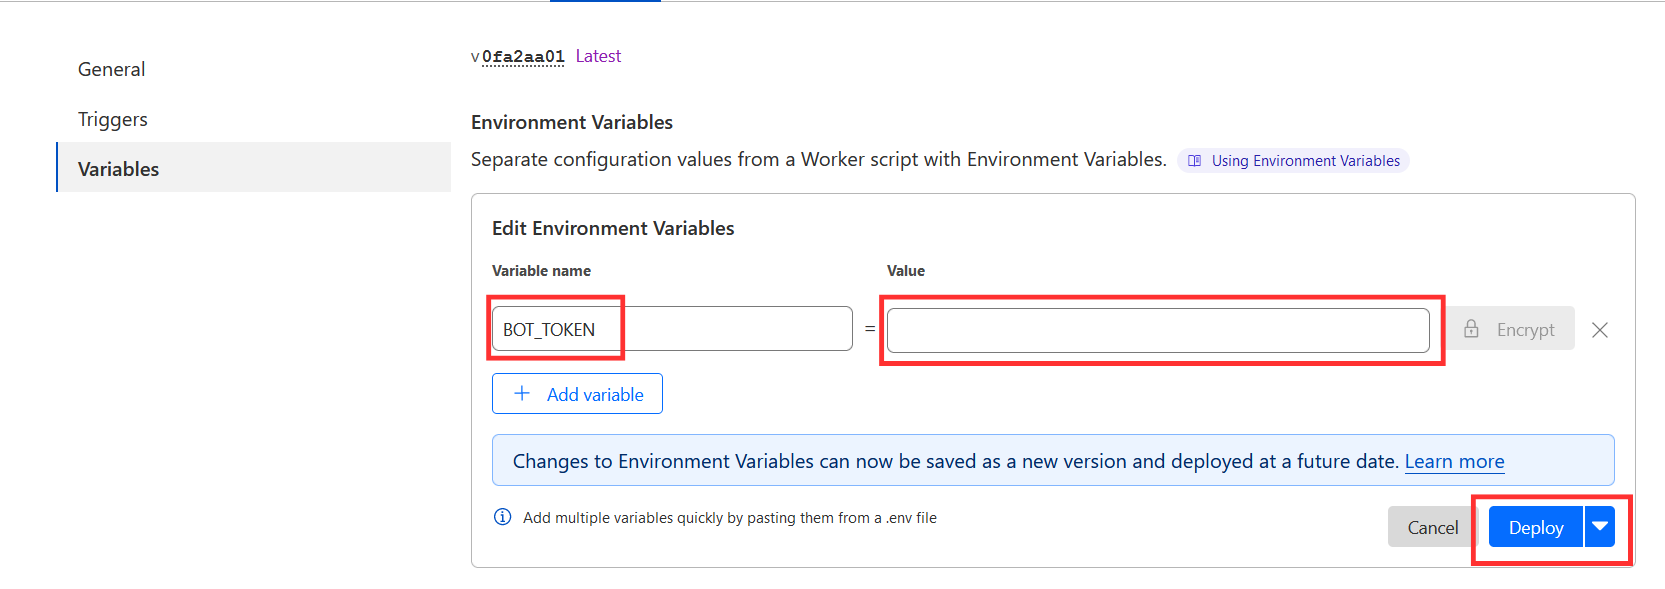
9. In the same "Variables" section, you will find the "Environment Variables" section. Click "Add Variable" and add the Telegram bot HTTP API key obtained in step 1. Name it "BOT_TOKEN" and save it.
10. Next, you need to attach the bot's webhook to the application. You can do this by opening any terminal window and entering the following command:
curl -F "url=https://app-name.subdomain.workers.dev" https://api.telegram.org/bot
Using the HTTP key obtained in the first step, and the full https:// address of the application that you received in the fifth step.
11. After completing the tenth step, return to the created application in the "Workers & Pages" section, select "Edit Code" and enter the code provided below:
import { Ai } from './vendor/@cloudflare/ai.js';
export default {
async fetch(request, env) {
if (request.method !== 'POST') {
return new Response('Expected POST', { status: 405 });
}
let reqBody;
try {
reqBody = await request.json();
} catch (error) {
return new Response('Bad request', { status: 400 });
}
if (!reqBody || !reqBody.message || !reqBody.message.text) {
return new Response("No message text provided", { status: 400 });
}
const { text } = reqBody.message;
const chatId = reqBody.message.chat.id;
let history = await env.KV.get(`history_${chatId}`);
history = history ? JSON.parse(history) : [];
if (history.length >= 20) { // Change the number depending on the length of the history you want to keep
history = history.slice(-20);
}
history.push({role: 'user', content: text});
const ai = new Ai(env.AI);
let aiInput = {
messages: history.map(msg => ({ role: msg.role, content: msg.content }))
};
let aiResponse, responseText;
try {
aiResponse = await ai.run('@cf/meta/llama-2-7b-chat-int8', aiInput);
responseText = aiResponse.response || "Sorry, I couldn't generate a response.";
if (!responseText) {
responseText = "Sorry, I couldn't generate a response.";
}
} catch (error) {
return new Response("AI processing failed", { status: 500 });
}
history.push({role: 'ai', content: responseText});
await env.KV.put(`history_${chatId}`, JSON.stringify(history));
try {
const telegramResponse = await fetch(`https://api.telegram.org/bot${env.BOT_TOKEN}/sendMessage`, {
method: 'POST',
headers: { 'Content-Type': 'application/json' },
body: JSON.stringify({
chat_id: chatId,
text: responseText
})
});
const telegramResult = await telegramResponse.json();
return new Response('Message sent to Telegram', { status: 200 });
} catch (error) {
return new Response('Fetch failed', { status: 500 });
}
}
};
After entering this code and clicking "Deploy", your chatbot should start functioning.
11. Return to the Telegram app, go to the address of your created bot specified in the first step, and test your chatbot.
