How to automatically send discount codes to customers who filled out a survey, using "Power Automate"
Customer loyalty is one of the most important goals of every business. One of the ways to encourage customer loyalty is through loyalty programs and discount systems. But how to ensure that the customer actually receives the discount they are entitled to? Modern technologies provide the ability to automate this process. "Power Automate" is a "Microsoft 365" tool that allows you to create automated workflows that can be integrated with different systems and applications.
In this article, we will discuss how can we use "Power Automate" together with a "Microsoft Forms" survey so that customers who responded to the survey are automatically sent a discount code from an "Excel" file. This simple automation does not require any technical knowledge and can save time, reduce the likelihood of errors, and improve customer satisfaction.
So let's start implementing it in practice!
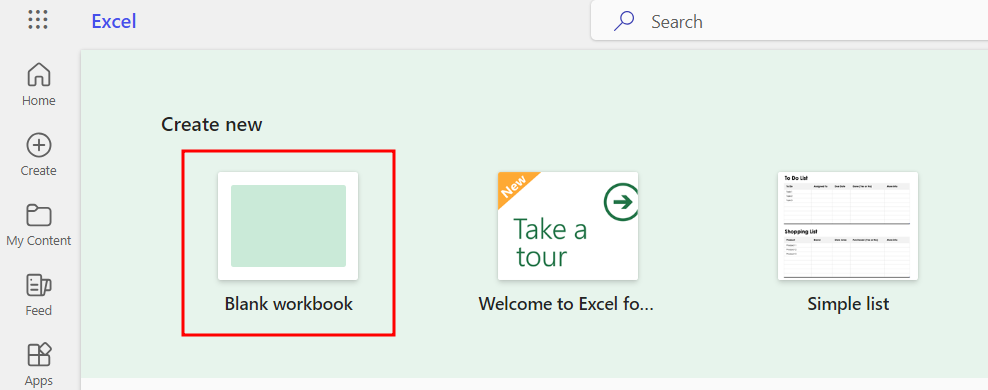
1. Sign in to your "Office Online Excel" account and create a new Excel document.
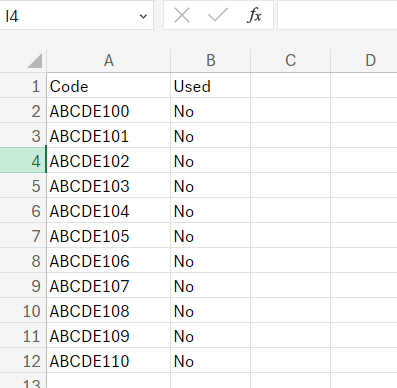
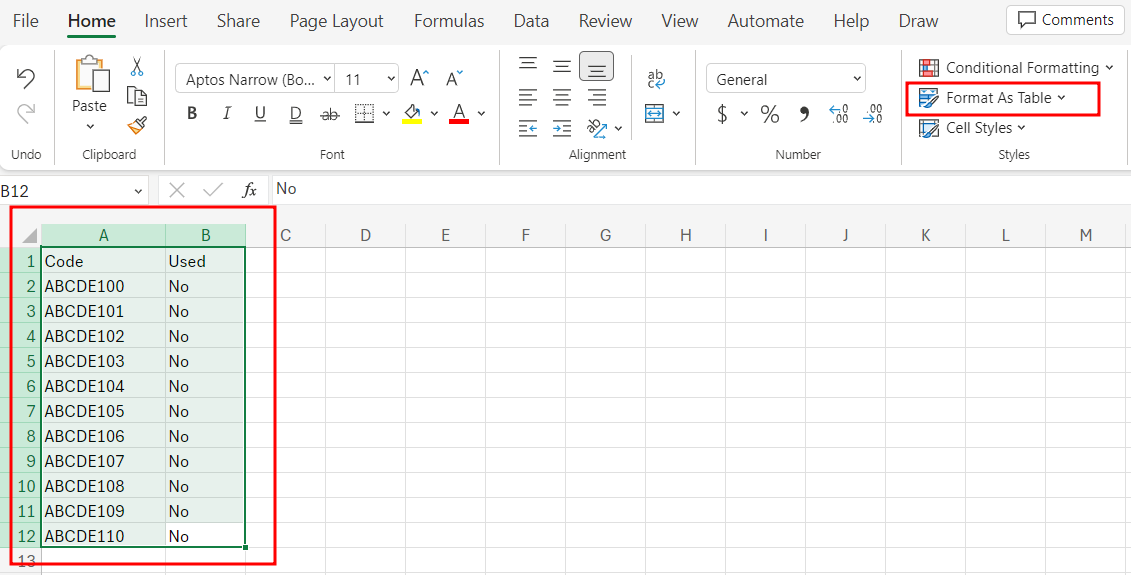
2. In the created Excel document, enter two columns: "Code" (for discount codes) and "Used" (to mark if the code is used). In the "Used" column, enter the value "No" for all rows. Fill in the "Code" column with discount codes.
3. Select the entire data range and format it as a table by choosing "Format As Table".
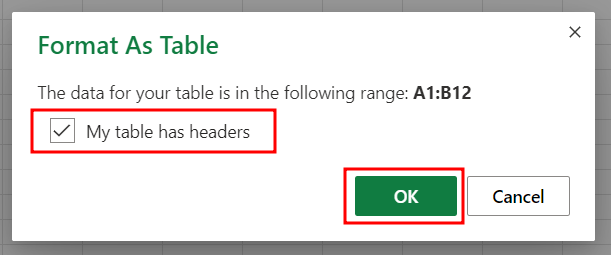
4. In the window that appears, check "My table has headers" and press "Ok".
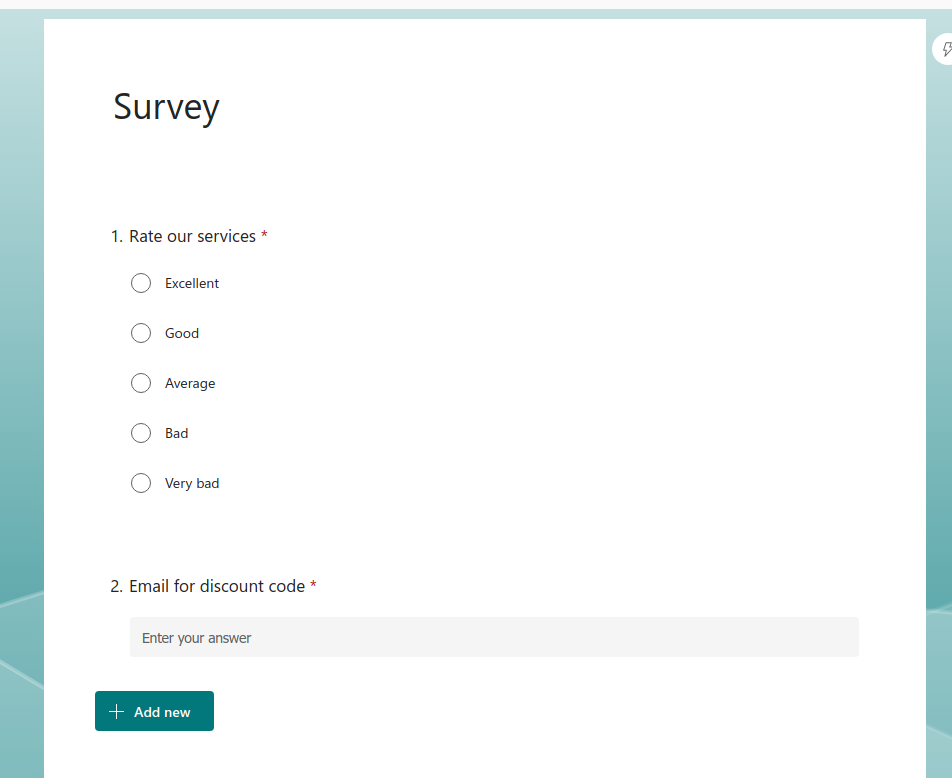
5. Using "Microsoft Forms", create a new survey form by selecting "New Quiz".

6. Create survey questions according to your needs, but don't forget to include a question about the respondent's email address to which the discount code will be sent.
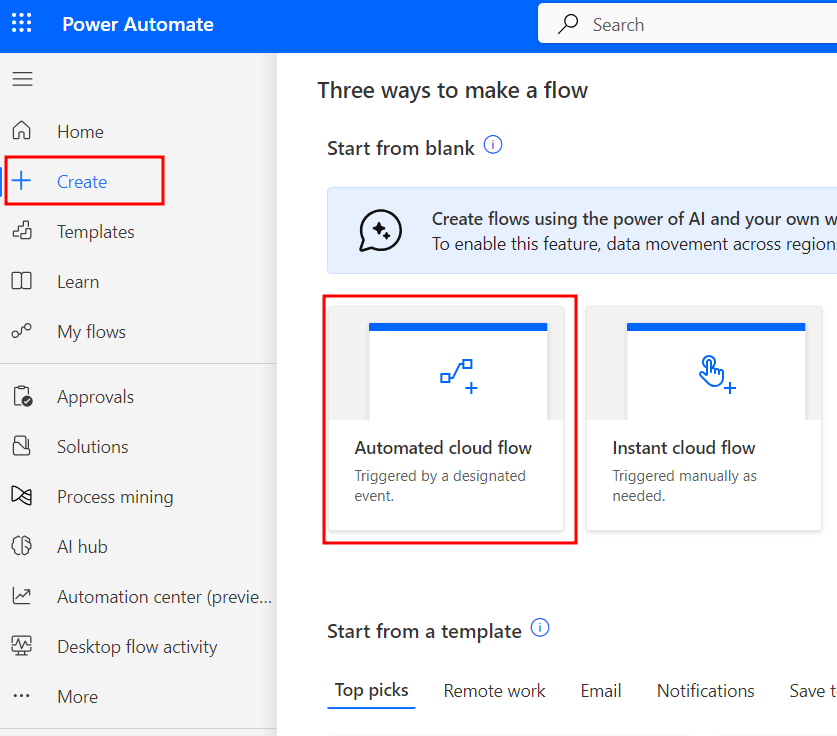
7. On the "Power Automate" platform, select "Create" and "Automated cloud flow".
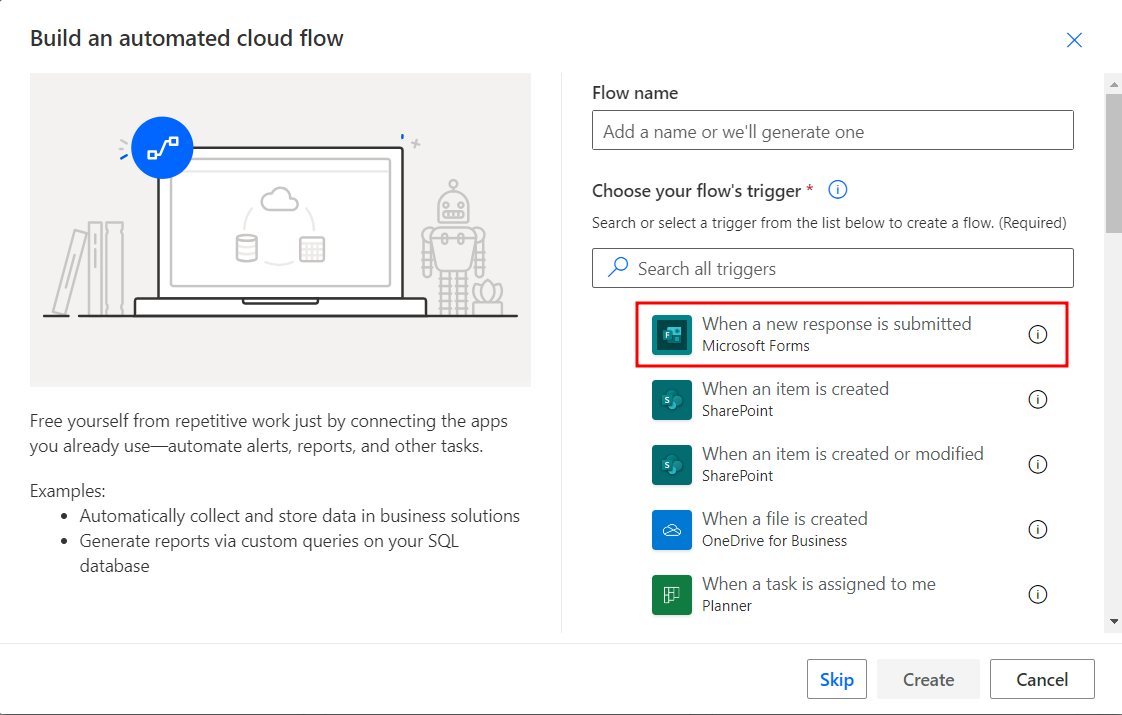
8. Select the "When a new response is submitted" trigger and press "Create".
9. In the first process element, select "Change connection" and connect your account. In the "Form id" field, select the previously created survey form.

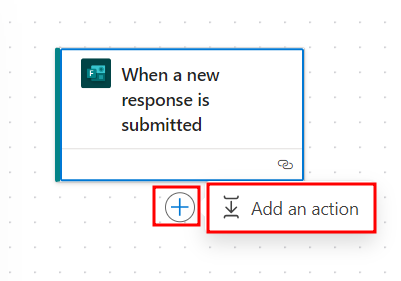
10. Add a new action by clicking the plus sign and selecting "Add an Action".
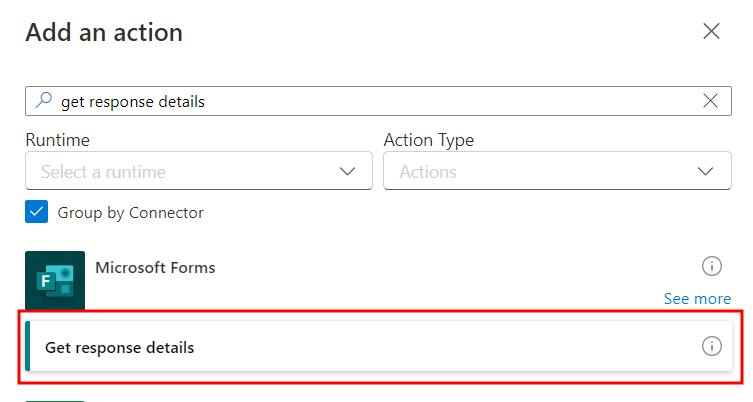
11. From the list of actions, select "Get response details".
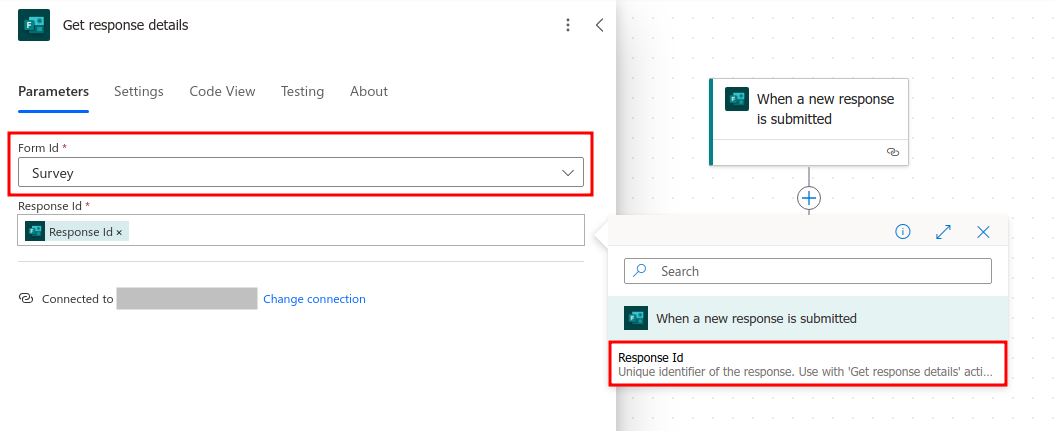
12. In the action settings, select the created survey form in the "Form id" field again, and in the "Response id" field, select "When a new response is submitted - Response id".
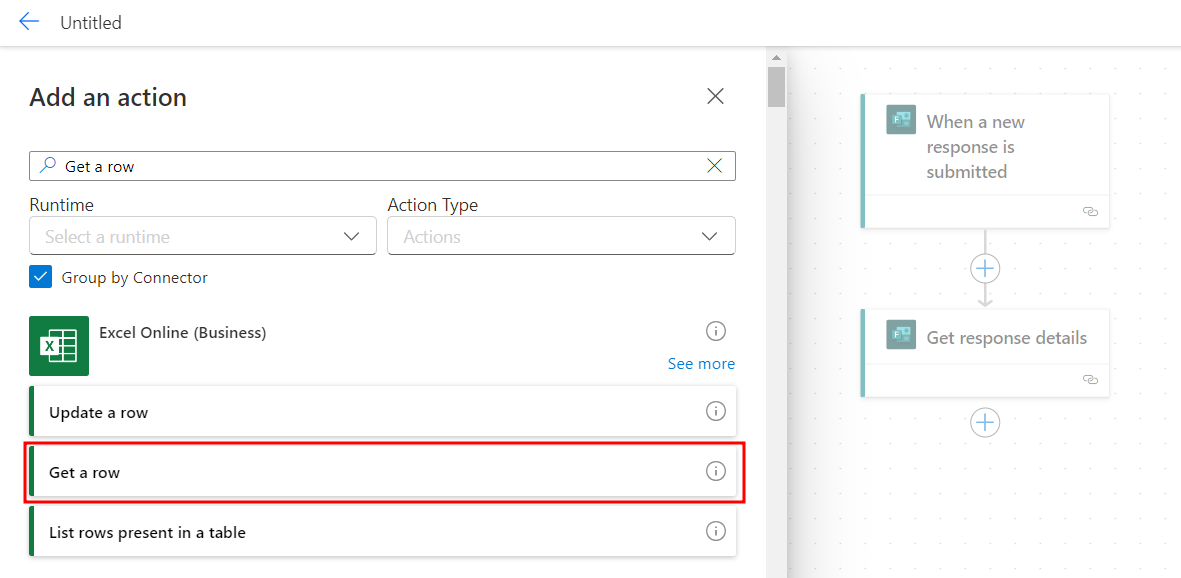
13. Add another action "Get a row" from "Excel Online (Business)".
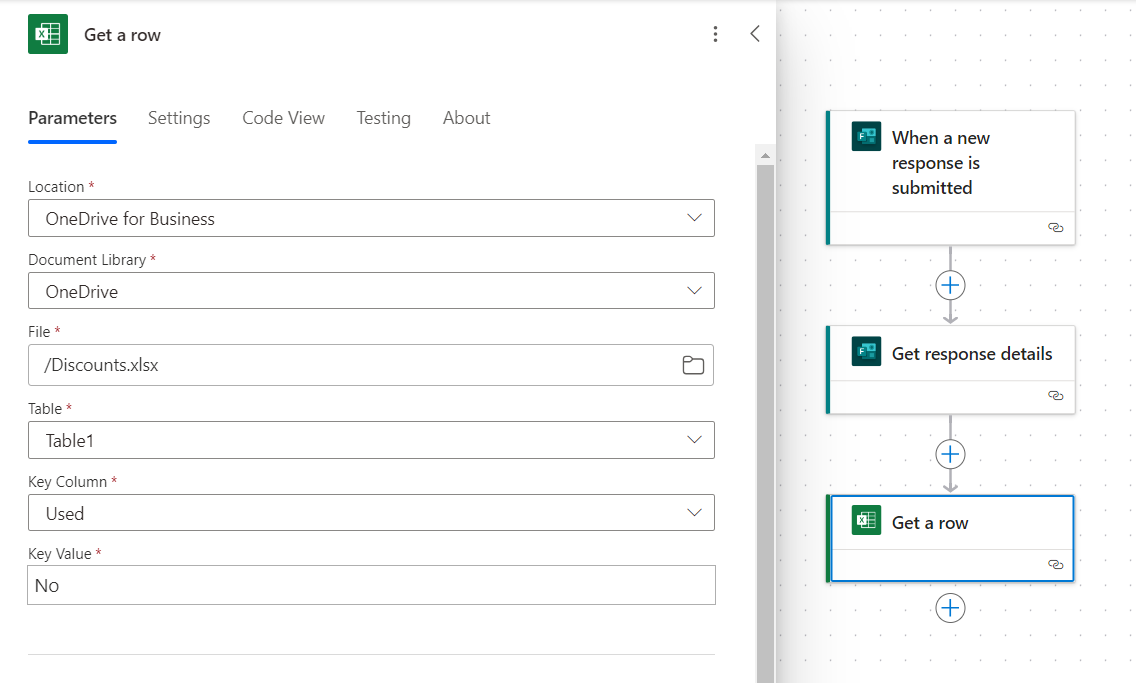
14. In the action settings, select your "OneDrive" document library, Excel file with discount codes, table with codes. For "Key column", select "Used" and for "Key value", enter "No".
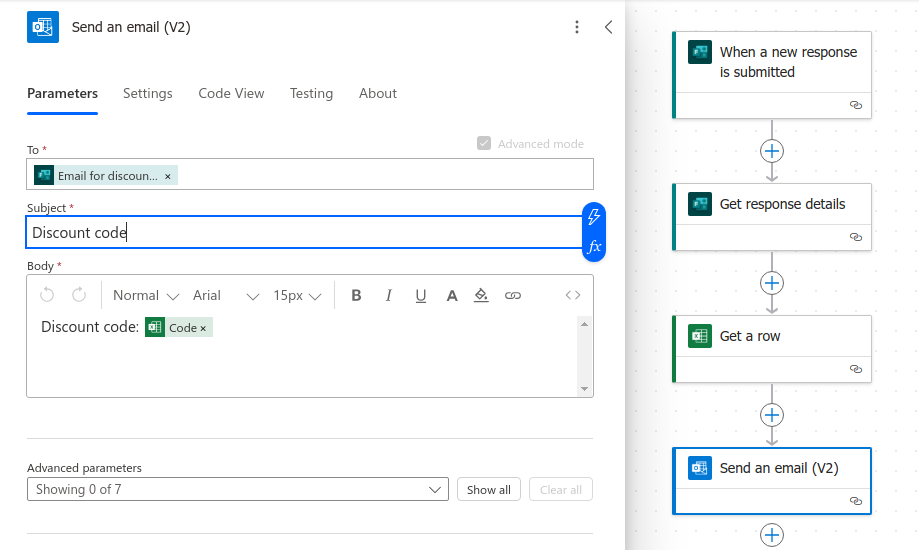
15. Next, add the "Send an email (V2)" action. In the "To" field, enter the respondent's email address from the survey, and in the "Body" field, insert the discount code from the Excel file.
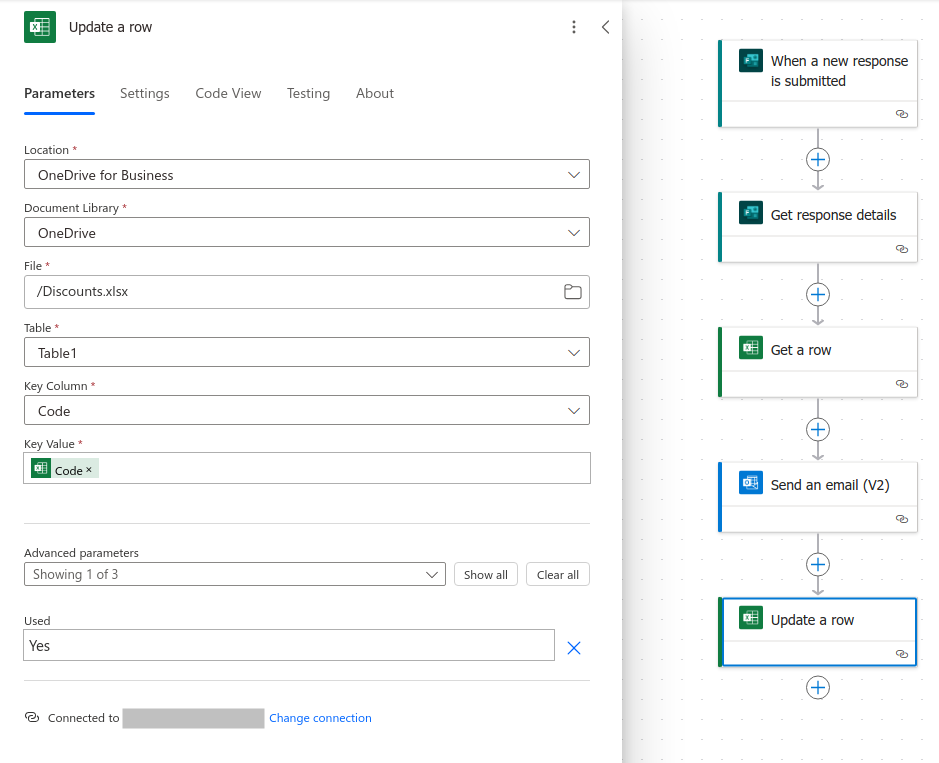
16. Finally, add the "Update a row" action from "Excel Online (Business)". Select the same Excel file and table, specify "Code" for "Key column", and enter the code from the previous "Get a row" action for "Key value". In the "Advanced parameters" section, next to "Used", enter the value "Yes".
17. Test your automated process by clicking "Test".

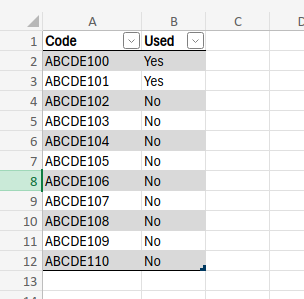
18. After filling out the form, you should receive the discount code by email, and in the Excel file, you will see that the "Used" value has changed to "Yes" for the used codes.
